

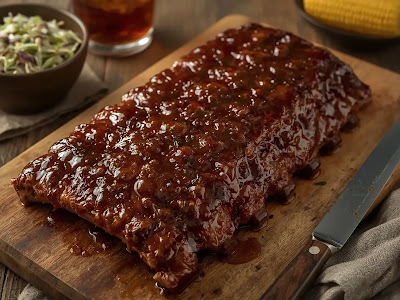
There’s something deeply comforting about strawberry preserves tucked into soft, golden cookies. Whether you’re revisiting a childhood memory or baking a new tradition, these cookies deliver a jammy sweetness that’s both nostalgic and indulgent. The dough is buttery with just a touch of spice, while the filling adds that irresistible pop of fruity richness.
This recipe takes inspiration from classic filled cookies, like the kind you’d find in Grandma’s kitchen or at a vintage bake sale. But we’re also adding a modern baker’s touch: careful chilling, better balance of textures, and a method that ensures no leaks, no spreading—just joy in every bite. These strawberry preserve cookies are perfect for afternoon tea, weekend baking, or edible gifting all year long.
Let’s get baking and bring some old-fashioned sweetness back to the table—with a little extra finesse.
Recipe Information
- Prep Time: 1 hour (plus 2 hrs chilling)
- Cook Time: 15 minutes
- Total Time: 3 hours 15 minutes
- Servings: 36 cookies
- Difficulty: Intermediate
Ingredients
- 1 cup shortening
- 1 cup granulated sugar
- 1 cup packed brown sugar
- ¼ cup milk
- 1 teaspoon white vinegar
- 2 large eggs
- 1 teaspoon vanilla extract
- 3½ cups all-purpose flour
- 1 teaspoon baking powder
- 1 teaspoon baking soda
- 1 teaspoon salt
- 1 teaspoon ground nutmeg
- About 6 tablespoons strawberry preserves (more as needed)
For the Cookie Dough
For the Filling
Cooking Instructions
- Cream the fats and sugars: In a large mixing bowl, beat together the shortening, granulated sugar, and brown sugar until the mixture is light and fluffy—this should take about 3 minutes. Proper creaming ensures tender cookies with structure.
- Create a quick buttermilk blend: In a small bowl, stir the milk and vinegar together and let it sit for 5 minutes until slightly thickened. This gentle souring adds a subtle tang and softens the dough texture.
- Combine wet ingredients: Beat the eggs and vanilla into the creamed sugars, followed by the buttermilk mixture. Mix until smooth and fully combined.
- Mix the dry ingredients: In a separate bowl, sift together the flour, baking powder, baking soda, salt, and nutmeg. Sifting helps evenly distribute the rising agents and spices.
- Incorporate and chill: Gradually add the dry ingredients to the wet mixture, stirring until a soft dough forms. Be careful not to overmix. Cover and refrigerate the dough for at least 2 hours, or overnight if possible. This resting step improves texture and flavor, and makes rolling much easier.
- Prepare to bake: Preheat the oven to 350°F (175°C). Line two baking sheets with parchment paper. Take the dough out of the fridge and allow it to sit for 5–10 minutes to soften just enough to roll.
- Roll and cut: On a lightly floured surface or floured parchment paper, roll the dough to about ¼-inch thickness. Use a 2-inch round cookie cutter to cut out even rounds. Gather and reroll scraps as needed, keeping unused dough chilled.
- Fill with preserves: Place half the rounds on the prepared baking sheets. Spoon 1 teaspoon of strawberry preserves into the center of each. Gently swirl the preserves with a spoon for texture and visual appeal.
- Top and seal: Cover with the remaining dough rounds. Press the edges lightly with the tines of a fork to seal. For a traditional touch, use a paring knife to make a small "X" in the top of each cookie—this helps steam escape and gives a rustic look.
- Chill again briefly: Place the assembled cookies in the refrigerator for 10–15 minutes before baking. This helps prevent spreading and ensures the cookies keep their shape.
- Bake to perfection: Bake for 13–15 minutes, rotating pans halfway through. The cookies are ready when the bottoms are golden brown and the filling is gently bubbling. Avoid overbaking to keep them soft.
- Cool and set: Let the cookies cool on the baking sheets for 3–5 minutes, then transfer them to wire racks. This final resting stage sets the crumb while keeping them pillowy and tender.
Tips, Variations & Serving Suggestions
- Use seedless preserves: For a smoother center and less mess, opt for high-quality, seedless strawberry preserves or jam.
- Change the flavor: Try swapping in raspberry or apricot preserves for a different twist—just make sure the filling isn’t too runny.
- Serve with tea or coffee: These cookies shine when paired with a warm beverage. Their gentle sweetness makes them perfect for brunch tables or teatime spreads.
- Make it a gift: Stack cooled cookies in parchment-lined tins or wrap them in cellophane bags tied with ribbon for charming homemade gifts.
- Freeze for later: Baked cookies freeze well for up to 2 months. Thaw at room temperature for 30 minutes before serving.
Conclusion
With a soft, buttery dough and a jewel-like center of sweet strawberry preserves, these cookies offer both flavor and comfort in every bite. They’re a step up from ordinary drop cookies, thanks to the layered construction and extra attention to chilling and sealing. Whether made for a holiday tray or a cozy weekend snack, they’re the kind of treat that feels familiar yet special.
To explore the original recipe or give credit where it’s due, feel free to visit the original source here.
FAQ
Can I use butter instead of shortening?
Yes, but the texture will change slightly. Shortening gives a tender, soft bite with less spreading. If using butter, chill the dough longer and bake a test batch first.
Why did my cookies spread too much?
This usually happens if the dough isn’t cold enough. Make sure to chill the dough after mixing and again after shaping to help the cookies hold their form.
Can I make these cookies gluten-free?
Yes, you can substitute a 1:1 gluten-free baking flour. Just ensure it contains xanthan gum or another binder to help with structure and prevent crumbling.


.png)

.png)
.png)

